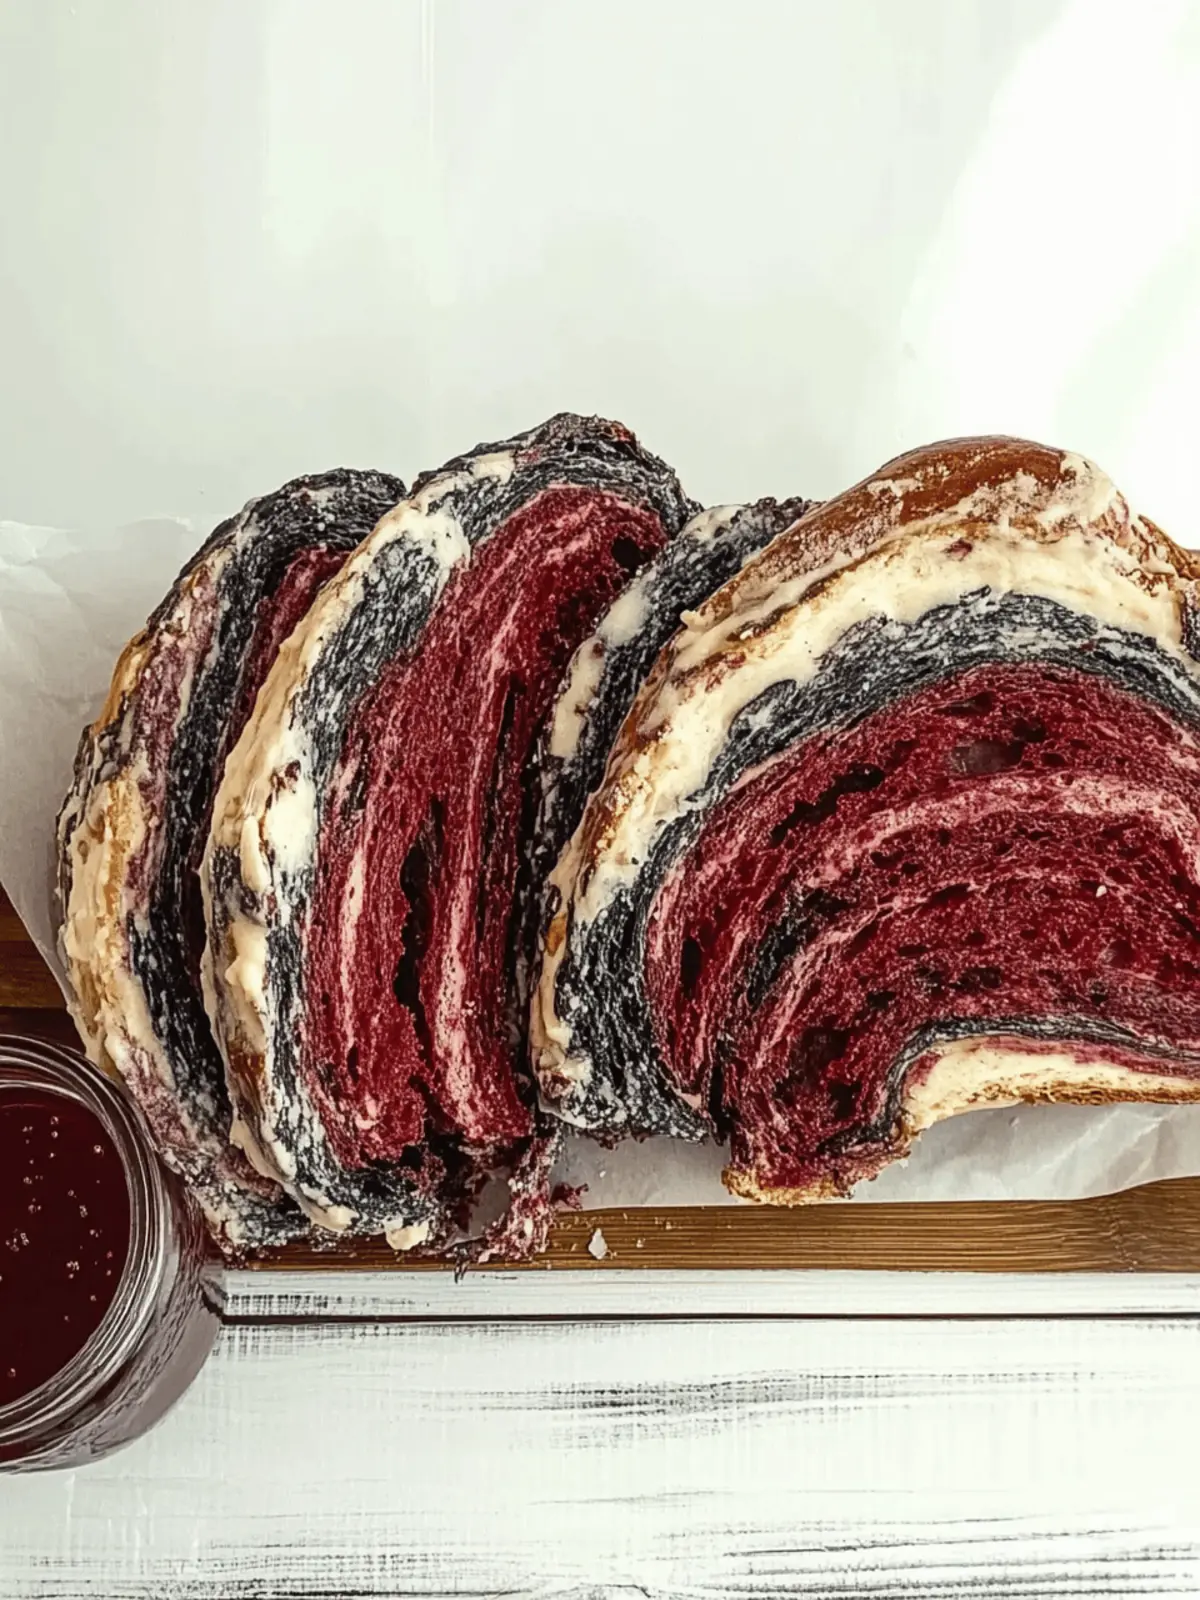
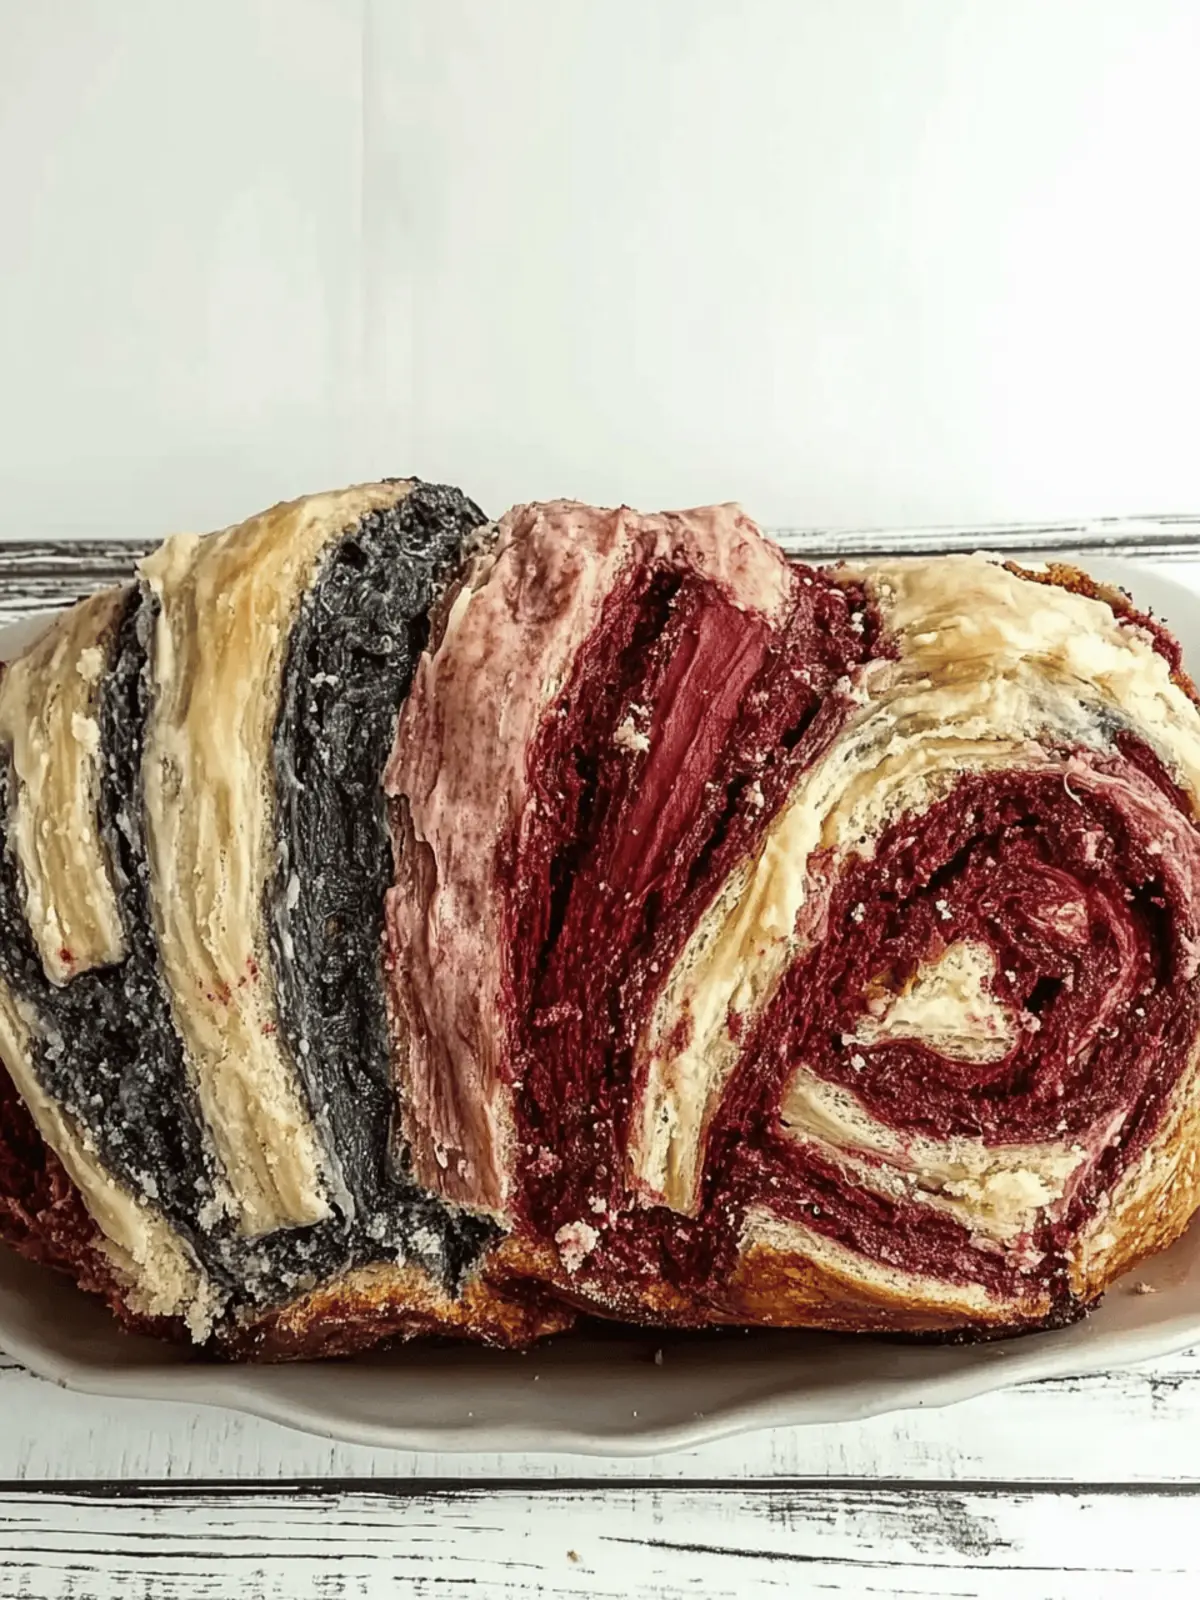
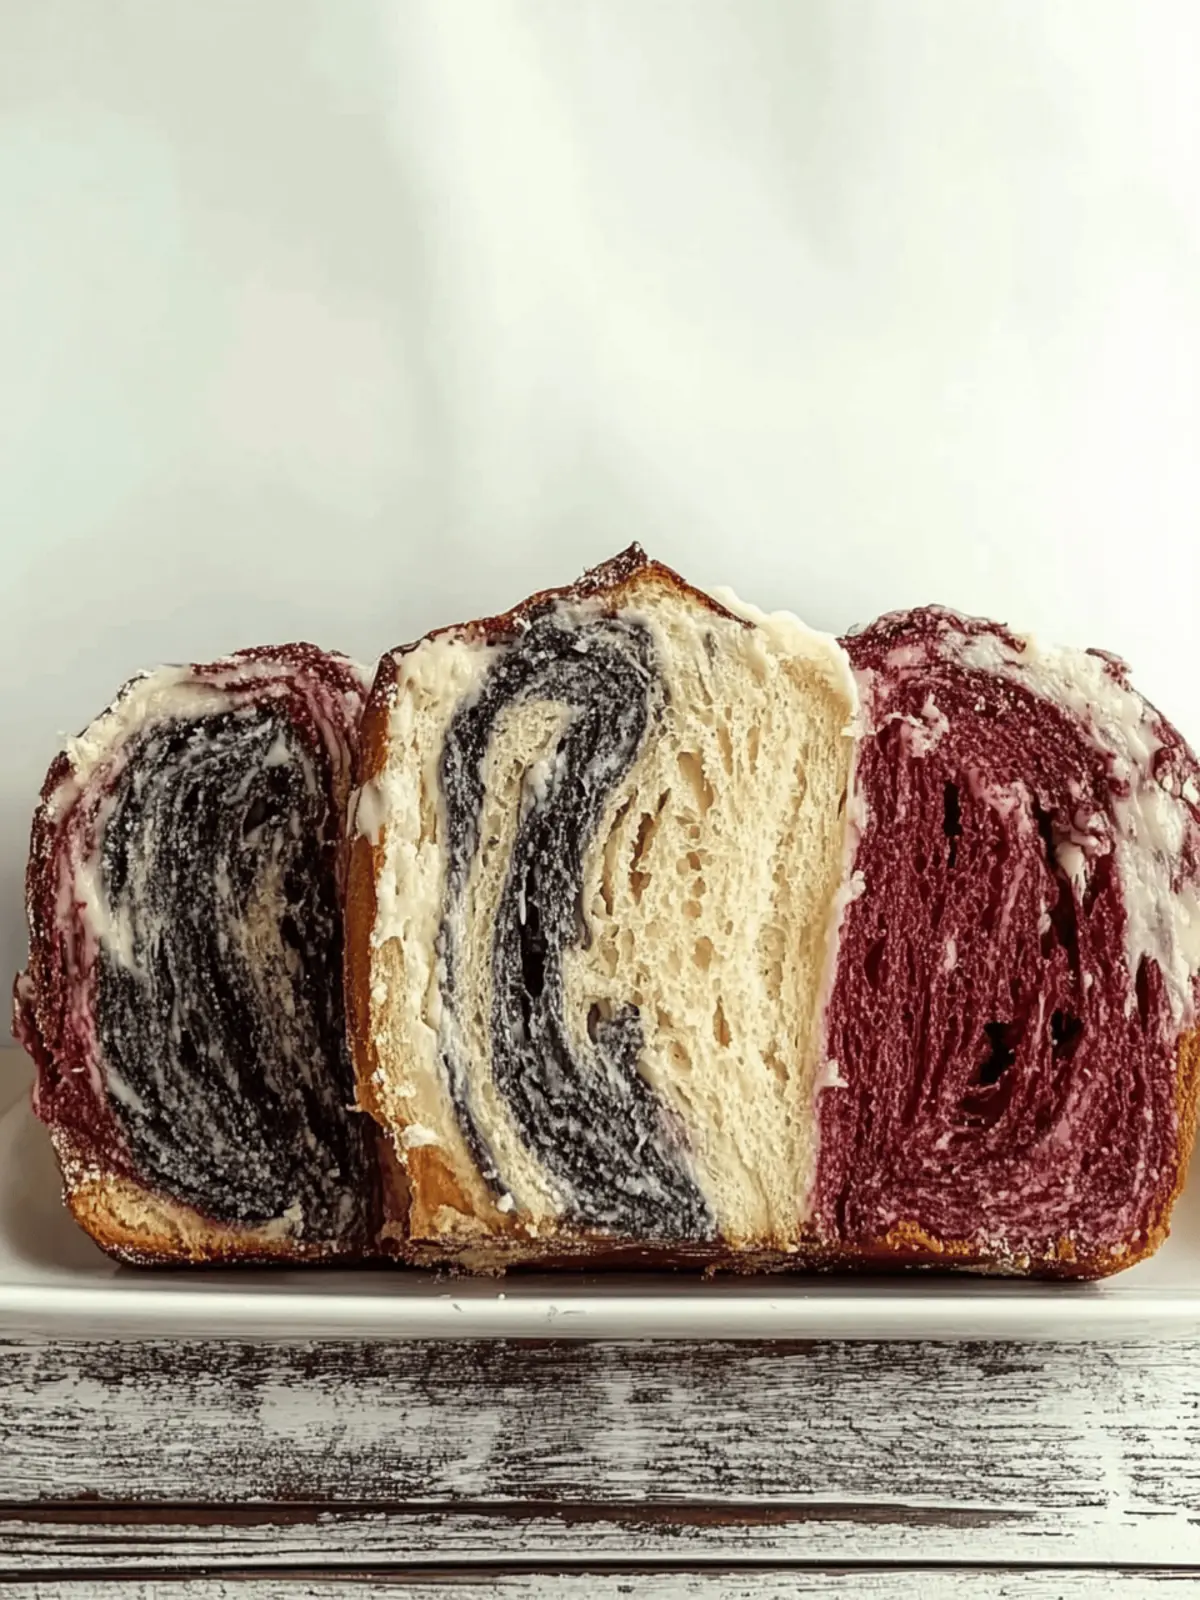
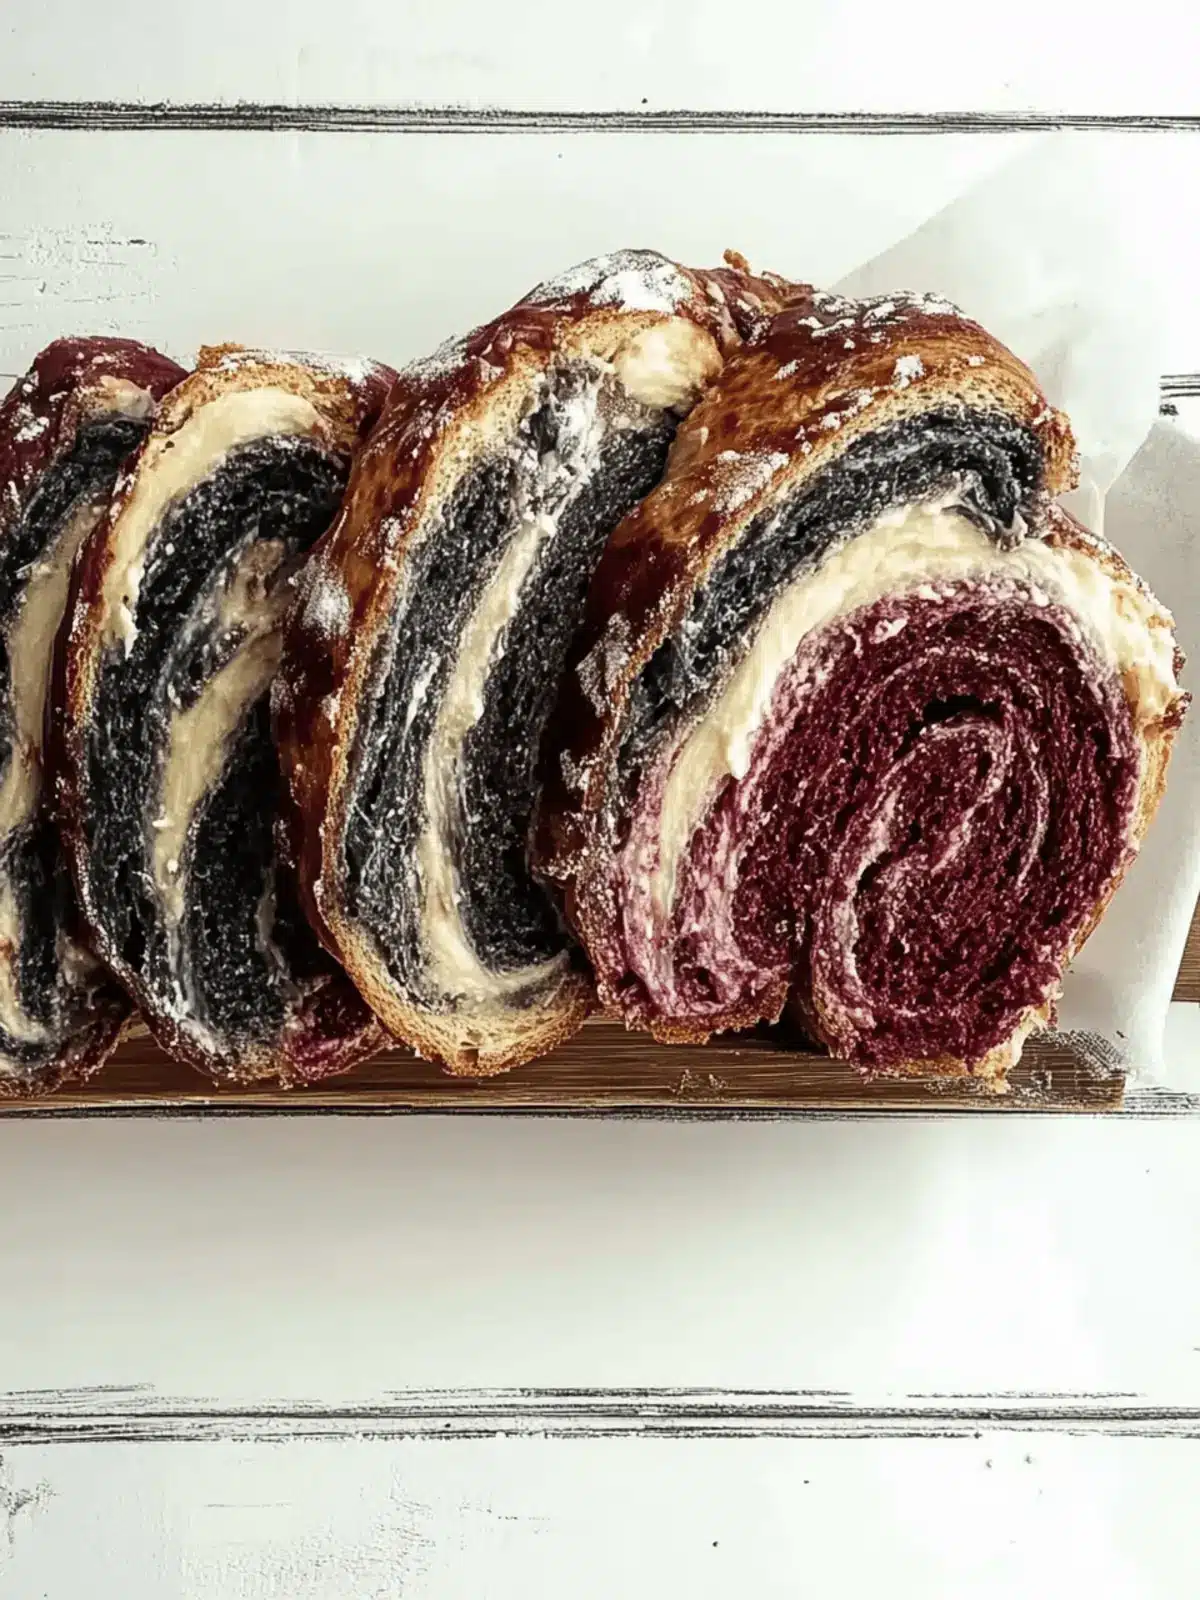
As Halloween approaches, the excitement in the air is palpable, and nothing brings a festive spirit to your table quite like a loaf of Vampire Bread! When I dreamed up this whimsical recipe, I couldn’t help but envision the delighted faces of friends and family as they sliced into this delightfully spooky creation, revealing its vibrant swirls of red and black.
Imagine the aroma of freshly baked bread wafting through your kitchen while you prepare a treat that is not just visually enticing but also low in fat and bursting with homemade goodness. Whether served as a show-stopping centerpiece at your Halloween party or enjoyed as a cozy breakfast with butter and jam, this colorful bread effortlessly combines fun and flavor.
What’s even better? It’s a guilt-free indulgence that caters to various dietary needs, making it the perfect addition to any gathering. So sharpen your knives and get ready to sink your fangs into a slice (or two) of this enchanting bliss! Let’s dive into how you can conjure up your own batch of Vampire Bread.
Why is Vampire Bread a Must-Try?
Delightfully Spooky: This Vampire Bread is the perfect Halloween treat that’s sure to impress.
Guilt-Free Indulgence: Low in fat and sodium, it caters to numerous dietary needs.
Visual Appeal: Striking red and black swirls create a breathtaking centerpiece.
Easy to Make: Simple ingredients come together for a fun baking experience.
Versatile Serving: Enjoy it warm with butter, or slice it for festive gatherings!
Memorable Moments: Create lasting memories with friends and family over this unique loaf.
Vampire Bread Ingredients
For the Dough
• All-purpose flour – Structure and texture. Substitute with gluten-free flour for a gluten-free version.
• Yeast – Leavening agent for lightness and rise. Use active dry yeast or fresh yeast.
• Sugar – Sweetness and enhances browning. Reduce for a less sweet bread.
• Salt – Flavor enhancement and strengthens gluten. Can be omitted for low-sodium diets.
• Water – Hydration for the dough. Use warm water to activate yeast effectively.
• Butter (or oil) – Adds richness and moisture. Substitute with plant-based butter for dairy-free.
For the Color
• Food coloring (red and black) – For a festive color swirl effect. Use natural dyes if preferred.
Get ready to bake your very own Vampire Bread and enjoy the spooky delight it brings to your home!
How to Make Vampire Bread
-
Prepare the Dough: In a large mixing bowl, combine all-purpose flour, sugar, yeast, and salt. Gradually pour in warm water and mix until a dough begins to form. Knead the mixture until it becomes smooth and elastic, about 8-10 minutes.
-
First Rise: Cover the dough with a clean kitchen towel and place it in a warm area. Let it rise for 1-2 hours, until it doubles in size. This is where your bread starts to come alive!
-
Color the Dough: Once risen, gently punch down the dough to release air. Divide it into two equal portions. Color one half with black food coloring and the other with red, kneading until the colors are deep and vibrant.
-
Shape the Loaf: On a lightly floured surface, roll out each portion of colored dough separately.
-
Combine the Colors: Layer the red dough atop the black dough and twist them together gently to form a loaf shape, creating beautiful swirls.
-
Second Rise: Allow the newly shaped loaf to rise again for about 30 minutes, covered with a towel, until it puffs up slightly.
-
Bake the Loaf: Preheat your oven to 350°F (175°C). Place the dough in the oven and bake for approximately 30 minutes, or until the bread is golden brown and sounds hollow when tapped.
-
Cool Down: Once baked, remove the bread from the oven and let it cool on a wire rack before slicing into its spooky vibrant interior.
Optional: Serve warm with a spread of butter or a sprinkle of cinnamon sugar for an extra treat.
Exact quantities are listed in the recipe card below.
Vampire Bread Variations & Substitutions
Unleash your creativity with these tasty twists that can elevate your Vampire Bread experience!
-
Gluten-Free: Substitute all-purpose flour with a gluten-free flour blend for a delightful, gluten-free version. The flavor and texture won’t disappoint!
-
Dairy-Free: Use plant-based butter or oil instead of regular butter to keep this bread dairy-free without sacrificing moisture. It’s a swap that everyone will enjoy!
-
Less Sugar: Reduce the amount of sugar for a less sweet bread; add a pinch of stevia for a subtle sweetness that doesn’t carry the guilt.
-
Herb-Infused: Mix in dried herbs like rosemary or thyme for a unique flavor twist, turning this festive loaf into a savory treat that complements meals beautifully.
-
Natural Colors: Experiment with beet juice or activated charcoal for a natural way to add color without artificial dyes. Both options offer stunning visuals!
-
Spice It Up: Incorporate spices like cinnamon or nutmeg for a warming effect, making your Vampire Bread cozy and inviting for the fall season.
-
Swirl Additional Flavor: Add flavored extracts, like almond or vanilla, to the dough for a surprise twist with every slice, making your bread a fragrant delight!
-
Savory Variety: Add finely chopped olives or sun-dried tomatoes into the dough for a rich, savory flavor that pairs wonderfully with cheese spreads.
Expert Tips for Vampire Bread
- Warm Water: Ensure the water is warm, but not hot, to avoid killing the yeast during dough preparation.
- Elastic Dough: Knead the dough until it’s elastic; this helps achieve the perfect texture for your Vampire Bread.
- Color Variation: Experiment with different food color combinations for unique swirls, but ensure even mixing for vibrancy.
- Tight Spiral: When twisting the colored dough, keep a tight spiral for more defined swirls and an eye-catching loaf.
- Monitor Baking: Keep an eye on the baking time; overbaking can lead to dryness—aim for a golden brown crust.
- Cool Completely: Allow the bread to cool completely on a wire rack before slicing to maintain the fluffy interior and beauty of your Vampire Bread.
Make Ahead Options
These vibrant Vampire Bread loaves are perfect for busy home cooks looking to save time during the Halloween season! You can prepare the dough up to 24 hours in advance by following the first rise, then shape the loaf and refrigerate it. Make sure to cover it well to prevent drying out. When you’re ready to bake, simply let the dough sit for 30 minutes at room temperature before preheating the oven. The quality remains just as delightful—soft, fluffy, and visually stunning—ensuring you have a show-stopping centerpiece with minimal effort. Whether you’re hosting a party or looking for an easy breakfast option, this make-ahead strategy has you covered!
What to Serve with Vampire Bread?
Elevate your spooky gatherings with delightful accompaniments that bring out the best in this vibrant loaf!
-
Savory Garlic Butter: Rich garlic butter complements the slightly sweet bread, enhancing each bite with a savory twist. Spread it warm for a truly indulgent experience.
-
Homemade Jam: A dollop of sweet, homemade fruit jam adds a splash of flavor, perfectly contrasting the bread’s festive aesthetics. Try raspberry or blackcurrant for a touch of tartness!
-
Creamy Cheese Spread: A tangy cream cheese spread pairs wonderfully with the sweetness of the bread, adding a creamy richness that makes every slice an unforgettable delight.
-
Pumpkin Soup: For a cozy fall meal, serve Vampire Bread alongside a warm bowl of creamy pumpkin soup. The comforting flavors and textures create a heartwarming combo just right for Halloween!
-
Spiced Hot Apple Cider: Warm spiced apple cider makes a delightful beverage pairing. The cinnamon and clove notes perfectly complement the playful essence of the bread.
-
Chocolate Dipping Sauce: For a sweet twist, try a dark chocolate dipping sauce. The indulgent richness elevates your Vampire Bread into a decadent dessert perfect for any celebration.
-
Cinnamon Sugar Spread: Mix butter with cinnamon and sugar, and slather it on warm slices for an extra treat. The sweetness mixed with spices will delight the senses.
-
Fruit Salad: A refreshing fruit salad with seasonal fruits adds a lightness, balancing the fullness of the bread. Choose vibrant fruits to echo the bread’s colors!
-
Marshmallow Fluff: Spread a layer of fluffy marshmallow topping for a fun, sweet treat that kids and adults will both enjoy. It’s a playful addition that brings out the festive spirit.
Storage Tips for Vampire Bread
- Room Temperature: Store the Vampire Bread in an airtight container at room temperature for up to 3 days to maintain its freshness and softness.
- Freezer: For longer storage, wrap the bread tightly in plastic wrap or aluminum foil and freeze it for up to 2 months. Thaw at room temperature when ready to enjoy!
- Reheating: To refresh slices of Vampire Bread, pop them in a toaster or warm them in a microwave for about 10-15 seconds until just heated.
- Avoiding Dryness: Ensure the bread is completely cool before storing to prevent moisture condensation, which can lead to sogginess.
Vampire Bread Recipe FAQs
How do I select ripe ingredients for making Vampire Bread?
When choosing ingredients like flour and yeast for your Vampire Bread, look for high-quality all-purpose flour, which should be stored in a cool, dry place. Ensure the yeast is fresh; check the expiration date on the packet. If using food coloring, choose gel colors for vibrant hues without adding excess liquid.
How should I store Vampire Bread and how long does it last?
Store your Vampire Bread in an airtight container at room temperature for up to 3 days. This helps retain its soft texture. If you want to keep it longer, you can refrigerate it, but for the best taste and texture, store it in a cool, dry place away from direct sunlight.
Can I freeze Vampire Bread?
Absolutely! To freeze your Vampire Bread, wrap it tightly in plastic wrap or aluminum foil, then place it inside a freezer bag to protect it from freezer burn. It can last up to 3 months in the freezer. When you’re ready to enjoy it, simply thaw it at room temperature for a few hours or overnight.
What should I do if my dough doesn’t rise?
If your Vampire Bread dough doesn’t rise, it might be due to inactive yeast or water that was too hot or cold. Make sure to use warm water (about 110°F / 43°C) to activate the yeast properly. If your yeast seems old, do a test by dissolving it in warm water with a bit of sugar; if it bubbles after 5-10 minutes, it’s good to go!
Is Vampire Bread safe for those with dietary restrictions?
Yes, this Vampire Bread can accommodate various dietary needs. It is low in fat and sodium. Ensure you use gluten-free flour if needed, and substitute butter with a plant-based option for a dairy-free version. Additionally, it is free from peanuts and tree nuts, making it a safe treat for those with those allergies.
How can I make Vampire Bread more colorful?
For an even more vibrant Vampire Bread, you can layer the colors more drastically or swirl in additional colors of your choice! Gel food coloring works best as it gives the most intense pigment without changing the dough’s liquid balance. Mix different colors into the dough or create fun shapes from the swirls for a truly eye-catching loaf.
Vampire Bread: Spooktacularly Colorful Halloween Delight
Ingredients
Equipment
Method
- In a large mixing bowl, combine all-purpose flour, sugar, yeast, and salt. Gradually pour in warm water and mix until a dough begins to form. Knead the mixture until it becomes smooth and elastic, about 8-10 minutes.
- Cover the dough with a clean kitchen towel and place it in a warm area. Let it rise for 1-2 hours, until it doubles in size.
- Once risen, gently punch down the dough to release air. Divide it into two equal portions. Color one half with black food coloring and the other with red.
- On a lightly floured surface, roll out each portion of colored dough separately.
- Layer the red dough atop the black dough and twist them together gently to form a loaf shape.
- Allow the newly shaped loaf to rise again for about 30 minutes, covered with a towel.
- Preheat your oven to 350°F (175°C). Place the dough in the oven and bake for approximately 30 minutes.
- Once baked, remove the bread from the oven and let it cool on a wire rack before slicing.
