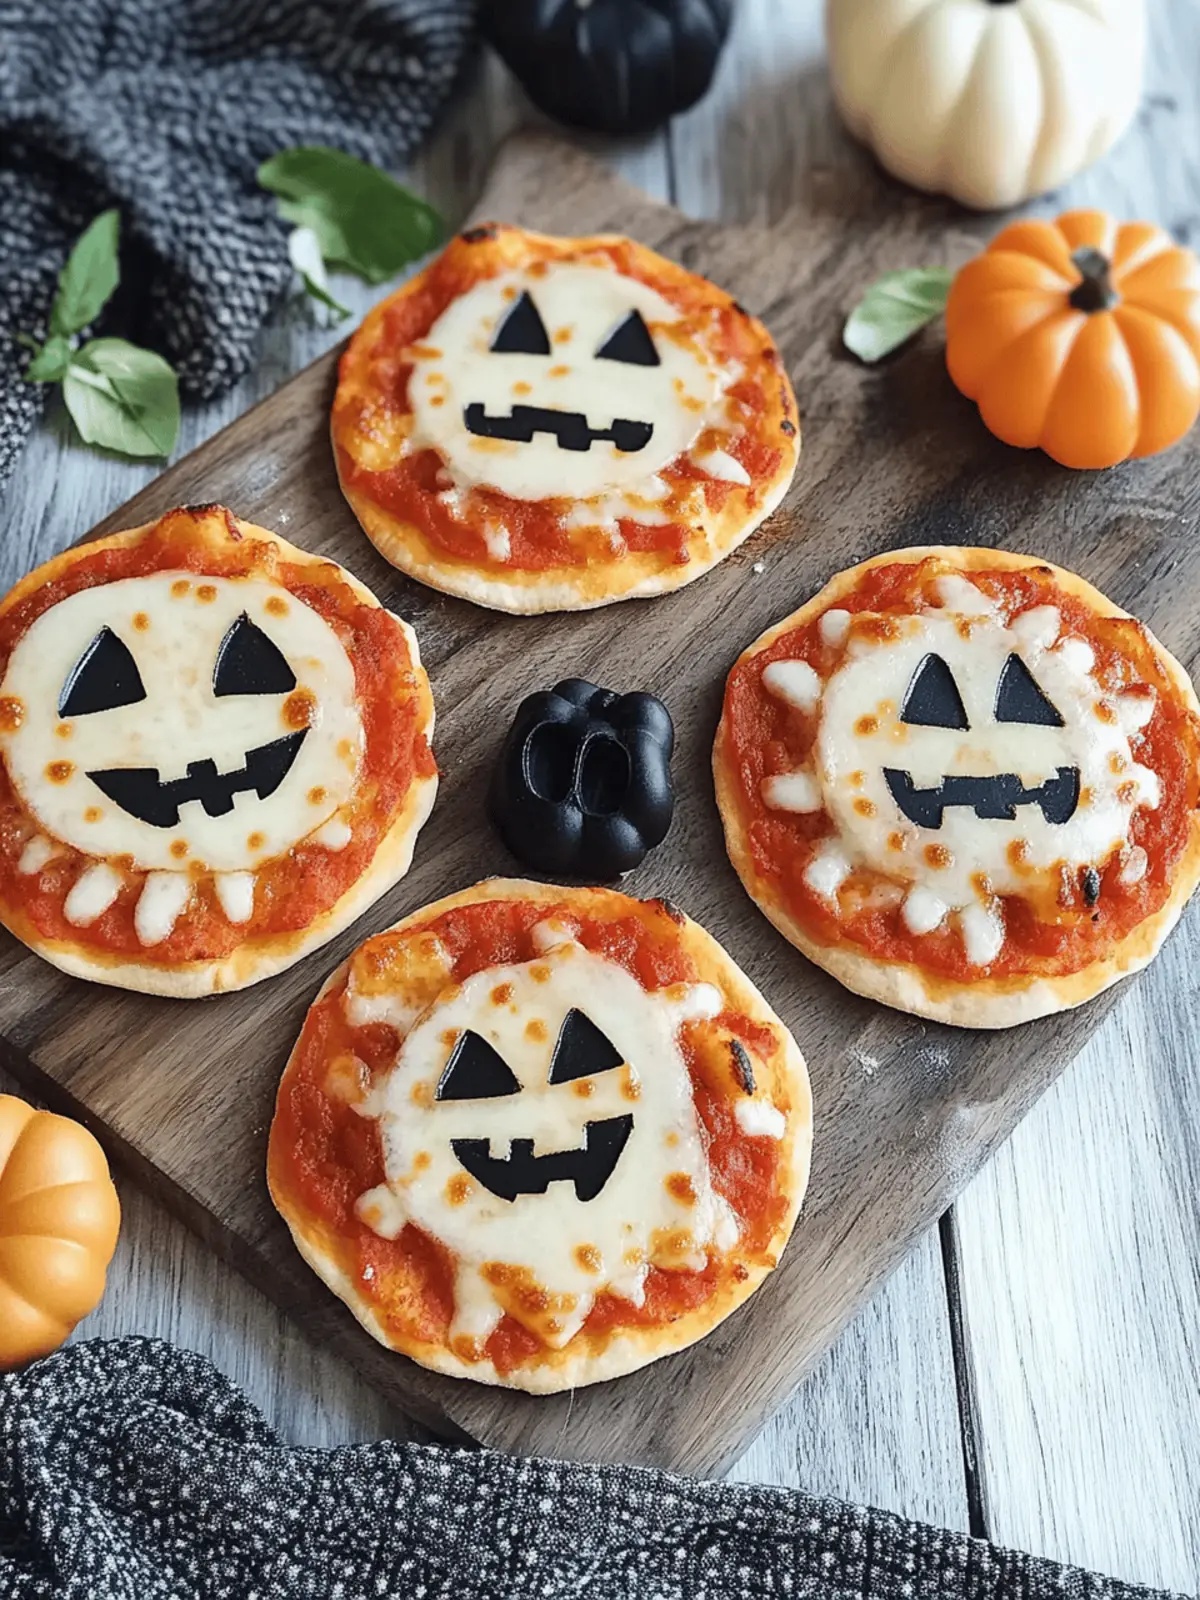
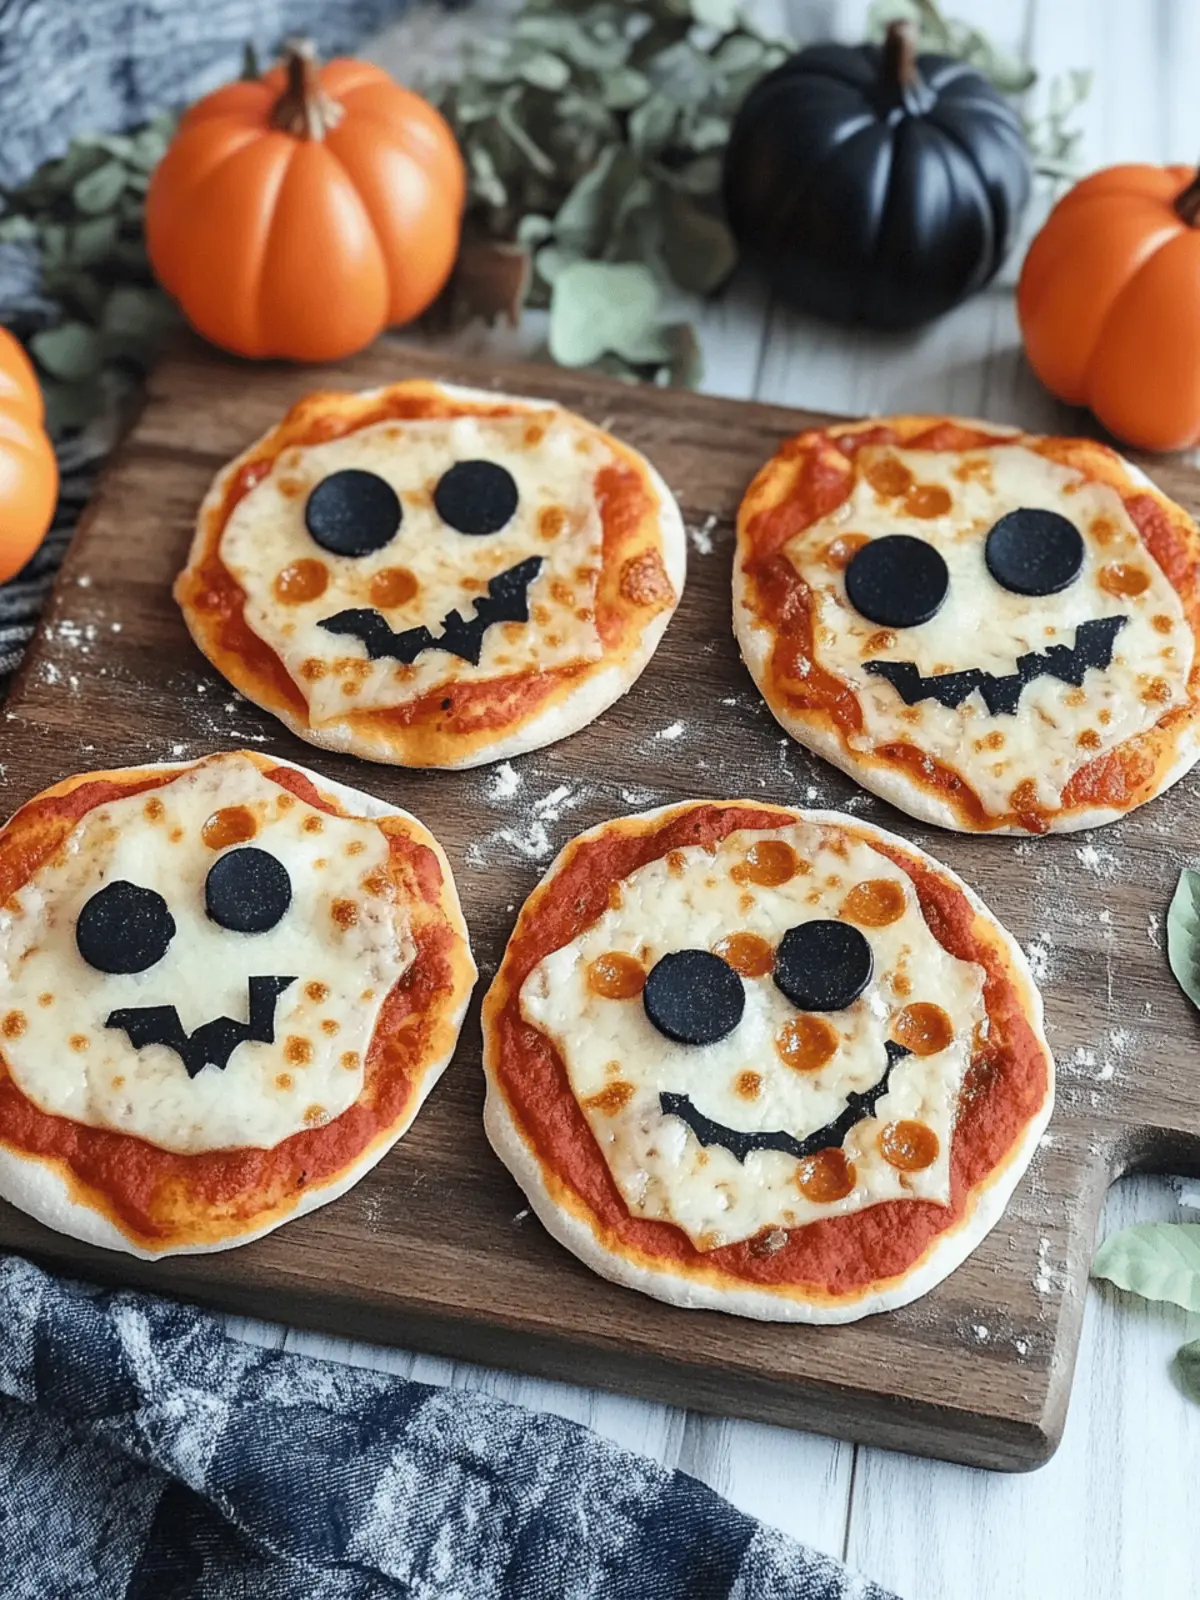
As the leaves turn vibrant shades of orange and the air fills with the scent of pumpkin spice, my thoughts drift to heartwarming traditions that bring families together. This Halloween, I’m excited to share a fun twist on a classic favorite that sparks creativity and joy—Halloween Mini Pizzas! Perfectly sized for little hands and brimming with spooky toppings, these bite-sized delights aren’t just a feast for the taste buds; they are a canvas for imagination.
In the spirit of the season, I love inviting my kids into the kitchen to craft their own creepy combinations—think mozzarella mummies and jack-o’-lantern faces made from colorful veggies. These mini pizzas not only satisfy those cravings for delicious comfort food, but they also transform into a festive activity that gets everyone involved. Whether you’re hosting a Halloween party or looking for a fun family night in, these customizable treats are a guaranteed hit—easy to make, packed with flavor, and oh-so-fun to decorate!
Why You’ll Love These Halloween Mini Pizzas
Easy to Customize: These Halloween Mini Pizzas are perfect for unleashing creativity with toppings, allowing everyone to craft their ultimate spooky creations.
Kid-Friendly Fun: Involve your little ones in the kitchen as they assemble their own eerie masterpieces, making meal prep a delightful bonding experience.
Quick to Make: With a speedy baking time, you can enjoy these festive snacks in no time, which is ideal for unexpected gatherings or last-minute celebrations.
Flavorful & Appealing: Each bite combines gooey cheese and savory toppings, providing a taste sensation that appeals to both kids and adults alike.
Great for Parties: Serve these mini pizzas at Halloween parties, and watch them disappear as guests are drawn to their fun designs and mouthwatering flavors.
For a smooth experience, consider prepping your toppings ahead of time—it’ll save you stress when it’s time to decorate!
Halloween Mini Pizzas Ingredients
For the Crusts
- Mini Pizza Crusts – Perfect personal-size bases that can be store-bought or homemade for convenience.
- Olive Oil Spray – Use this to lightly mist the baking sheet, ensuring your mini pizzas don’t stick.
For the Sauce
- Pizza Sauce – 3/4 cup of flavor-packed sauce that adds moisture; marinara can be a delightful alternative.
For the Cheese
- Mozzarella Cheese – 1 cup, shredded for that classic melty goodness; consider a dairy-free option if preferred.
- Part-Skim String Cheese – 4 sticks, pulled apart for crafting eerie mummy faces on your mini pizzas.
For the Toppings
- Black Olives – 1/4 cup, sliced for a savory touch; capers work as a substitute if you want something different.
- Mini Pepperoni – 1/4 cup, optional, to add a little protein and excitement to your pizzas—feel free to skip for a vegetarian version!
- Orange & Green Bell Peppers – Thin strips turn into spooky jack-o’-lanterns for delightful decor; other colorful veggies can add variation to your designs.
- Fresh Basil – 2 tbsp, chiffonade for a fresh pop of flavor; substituting with parsley or Italian seasoning is a great alternative.
Let your culinary creativity shine as you embark on this fun-filled cooking adventure with Halloween Mini Pizzas!
How to Make Halloween Mini Pizzas
-
Preheat the oven to 425°F (220°C) and lightly mist a baking sheet with olive oil spray. This step ensures that your mini pizzas bake evenly without sticking.
-
Spread 1-2 tablespoons of pizza sauce on each mini crust, ensuring to leave a border. This will provide moisture and flavor while preventing the crust from becoming soggy.
-
Sprinkle shredded mozzarella on half of the individual pizzas. For those crafting mummy faces, use pulled-apart string cheese to create wrapped layers.
-
Decorate with black olives as spider bodies, bell pepper strips as jack-o’-lantern mouths, and optional mini pepperoni for added fun and flavor. Let your creativity run wild!
-
Bake for 10-12 minutes until the crusts are golden brown and the cheese has melted beautifully. Remember to rotate the pan halfway through for even browning.
-
Let cool for 2 minutes and garnish with fresh basil before serving. This adds a fragrant touch, making them even more irresistible.
Optional: For an extra festive touch, drizzle a bit of balsamic glaze before serving.
Exact quantities are listed in the recipe card below.
What to Serve with Halloween Mini Pizzas?
Elevate your spooky celebrations with delightful accompaniments that complement the fun flavors of mini pizzas.
-
Crispy Veggie Platter: A vibrant assortment of fresh veggies served with a zesty dip brings a crunchy contrast to the savory pizzas.
-
Apple Cider: This refreshing drink perfectly matches the seasonal vibe, balancing the richness of the cheesy treats with its sweet and tangy notes.
-
Halloween-themed Fruit Salad: Include assorted seasonal fruits like oranges and grapes, adding a refreshing and healthy touch to your spooky meal.
-
Spooky Punch: A festive, colorful beverage with floating fruit and a hint of fizz adds an exhilarating twist that matches the playful theme.
-
Garlic Breadsticks: These warm, buttery breadsticks offer a comforting, flavorful side that pairs wonderfully with the cheesy goodness of your mini pizzas.
-
Chocolate-Dipped Ghosts: For a sweet finish, these cute treats made from marshmallows and chocolate add a delightful contrast to your savory bites.
-
Pumpkin Spice Cookies: These seasonal sweets bring a warm spice that enhances the festive atmosphere, making them a perfect dessert pairing.
Mix and match these ideas for a fun, flavorful Halloween feast that will leave everyone smiling!
How to Store and Freeze Halloween Mini Pizzas
Fridge: Store leftover Halloween Mini Pizzas in an airtight container for up to 3 days. Layer parchment paper between pizzas to keep them from sticking together.
Freezer: For long-term enjoyment, freeze fully assembled mini pizzas by placing them in a single layer on a baking sheet until solid. Then, transfer to a freezer-safe bag or container for up to 2 months.
Reheating: When ready to enjoy, bake from frozen at 425°F (220°C) for about 15-20 minutes, or until heated through and crispy. An air fryer can also be used for a quick reheating option if you want that perfect crunch!
Halloween Mini Pizzas Variations
Invite your culinary creativity to take the stage while crafting these delightful Halloween mini pizzas—there’s so much room for personalization!
- Gluten-Free: Swap traditional crusts for gluten-free pita or cauliflower pizza bases, making these treats suitable for everyone at your gathering.
- Dairy-Free: Use a dairy-free mozzarella alternative for a creamy texture that still satisfies those pizza cravings while being kinder to lactose-sensitive folks.
- Veggie-Loaded: Add a colorful array of vegetables like zucchini, mushrooms, or cherry tomatoes for a heartier and nutritious bite that even picky eaters will love!
- Spicy Kick: Sprinkle red pepper flakes or jalapeños on top for a fiery twist that will tantalize the taste buds of heat enthusiasts. Nothing like a little spice to liven up the celebration!
- Unique Sauces: Instead of the classic pizza sauce, try using pesto, barbecue sauce, or even a ranch drizzle to elevate the flavor profile and surprise your guests.
- Tropical Flair: Add pineapple chunks or sliced jalapeños for an adventurous Hawaiian twist that brings a unique sweetness and heat combination.
- Meat Lovers: Incorporate crumbled sausage or bacon bits for a more protein-packed option that will satisfy hearty appetites.
- Festive Drizzle: After baking, drizzle with balsamic glaze or a pesto swirl for an extra layer of flavor that not only adds taste but a visually appealing touch too!
Feel free to mix and match these ideas to create your own spooky masterpieces that will be a hit at any Halloween gathering!
Make Ahead Options
These Halloween Mini Pizzas are perfect for busy home cooks looking to save time when preparing for festive gatherings! You can prep the mini pizza crusts and toppings (like the sliced olives and bell peppers) up to 24 hours in advance, refrigerating them separately to maintain freshness. For even longer storage, fully assemble the mini pizzas and freeze them; they can last up to 3 months in the freezer! Just be sure to place parchment paper between pizzas to prevent sticking. When you’re ready to serve, simply bake them straight from frozen or after refrigerating for about 10-12 minutes at 425°F (220°C) for that wonderfully crispy bite. Enjoy the convenience without sacrificing flavor!
Expert Tips for Halloween Mini Pizzas
-
Perfect Pizza Base: Use fresh mini pizza crusts for a crispy texture. If using frozen, allow them to thaw slightly before assembling to avoid a soggy bottom.
-
Creative Toppings: Get imaginative! Try using ingredients like cherry tomatoes, mushrooms, or even artichokes for added flavor. Just remember to stick with the Halloween theme!
-
Kid-Friendly Assembly: Encourage your children to create their own designs with toppings. This not only makes cooking fun but also promotes healthier eating habits as they explore new veggies.
-
Watch the Bake Time: Keep an eye on your mini pizzas while they bake. They can go from perfectly golden to overcooked in a matter of minutes—rotate the pan halfway through for even results.
-
Storage Solutions: If you have leftovers, store your Halloween Mini Pizzas in an airtight container. Just add parchment paper between layers to prevent sticking!
Halloween Mini Pizzas Recipe FAQs
What kind of mini pizza crusts should I use?
I recommend using store-bought mini pizza crusts for convenience, but if you’re feeling adventurous, homemade crusts can bring an extra layer of flavor. Look for crusts that are fresh or pre-baked to ensure a crispy finish—always a plus for taste!
How should I store leftover Halloween Mini Pizzas?
To keep your leftover mini pizzas fresh, store them in an airtight container in the fridge for up to 3 days. Make sure to layer parchment paper between each pizza to prevent them from sticking together. They’ll stay delicious and ready for a quick snack!
Can I freeze Halloween Mini Pizzas?
Absolutely! For freezing, assemble your mini pizzas and place them in a single layer on a baking sheet until solid. After they’ve frozen, transfer them to a freezer-safe bag or container and keep them for up to 2 months. When you’re ready to enjoy them, just bake from frozen at 425°F (220°C) for about 15-20 minutes until they’re hot and crispy!
What if my mini pizzas aren’t baking evenly?
No worries! If you notice uneven baking, it’s likely due to oven hotspots. To troubleshoot, try rotating the baking pan halfway through the cooking time, as this promotes even heat distribution. Additionally, make sure your oven is properly preheated to the correct temperature before baking.
Are there any dietary considerations for the toppings?
Yes! To accommodate for allergies or dietary preferences, you can easily swap out ingredients. For instance, use dairy-free cheese alternatives if lactose intolerant or opt for vegetable toppings like zucchini and mushrooms instead of meats for a veggie version. Always check ingredient labels to ensure they meet dietary needs.
How can I involve kids in making these Halloween Mini Pizzas?
Getting kids involved is a fantastic idea! Allow them to choose their favorite toppings and assemble their mini pizzas. It’s a fun way to spark their creativity while encouraging adventurous eating. Just supervise their use of any sharp utensils and let the spooky design fun begin!

Halloween Mini Pizzas: Fun Family Treats for Spooky Celebrations
Ingredients
Equipment
Method
- Preheat the oven to 425°F (220°C) and lightly mist a baking sheet with olive oil spray.
- Spread 1-2 tablespoons of pizza sauce on each mini crust, leaving a border.
- Sprinkle shredded mozzarella on half of the pizzas; use string cheese for mummy faces.
- Decorate with black olives, bell pepper strips, and optional mini pepperoni.
- Bake for 10-12 minutes until crusts are golden brown and cheese is melted.
- Let cool for 2 minutes, garnish with fresh basil before serving.


