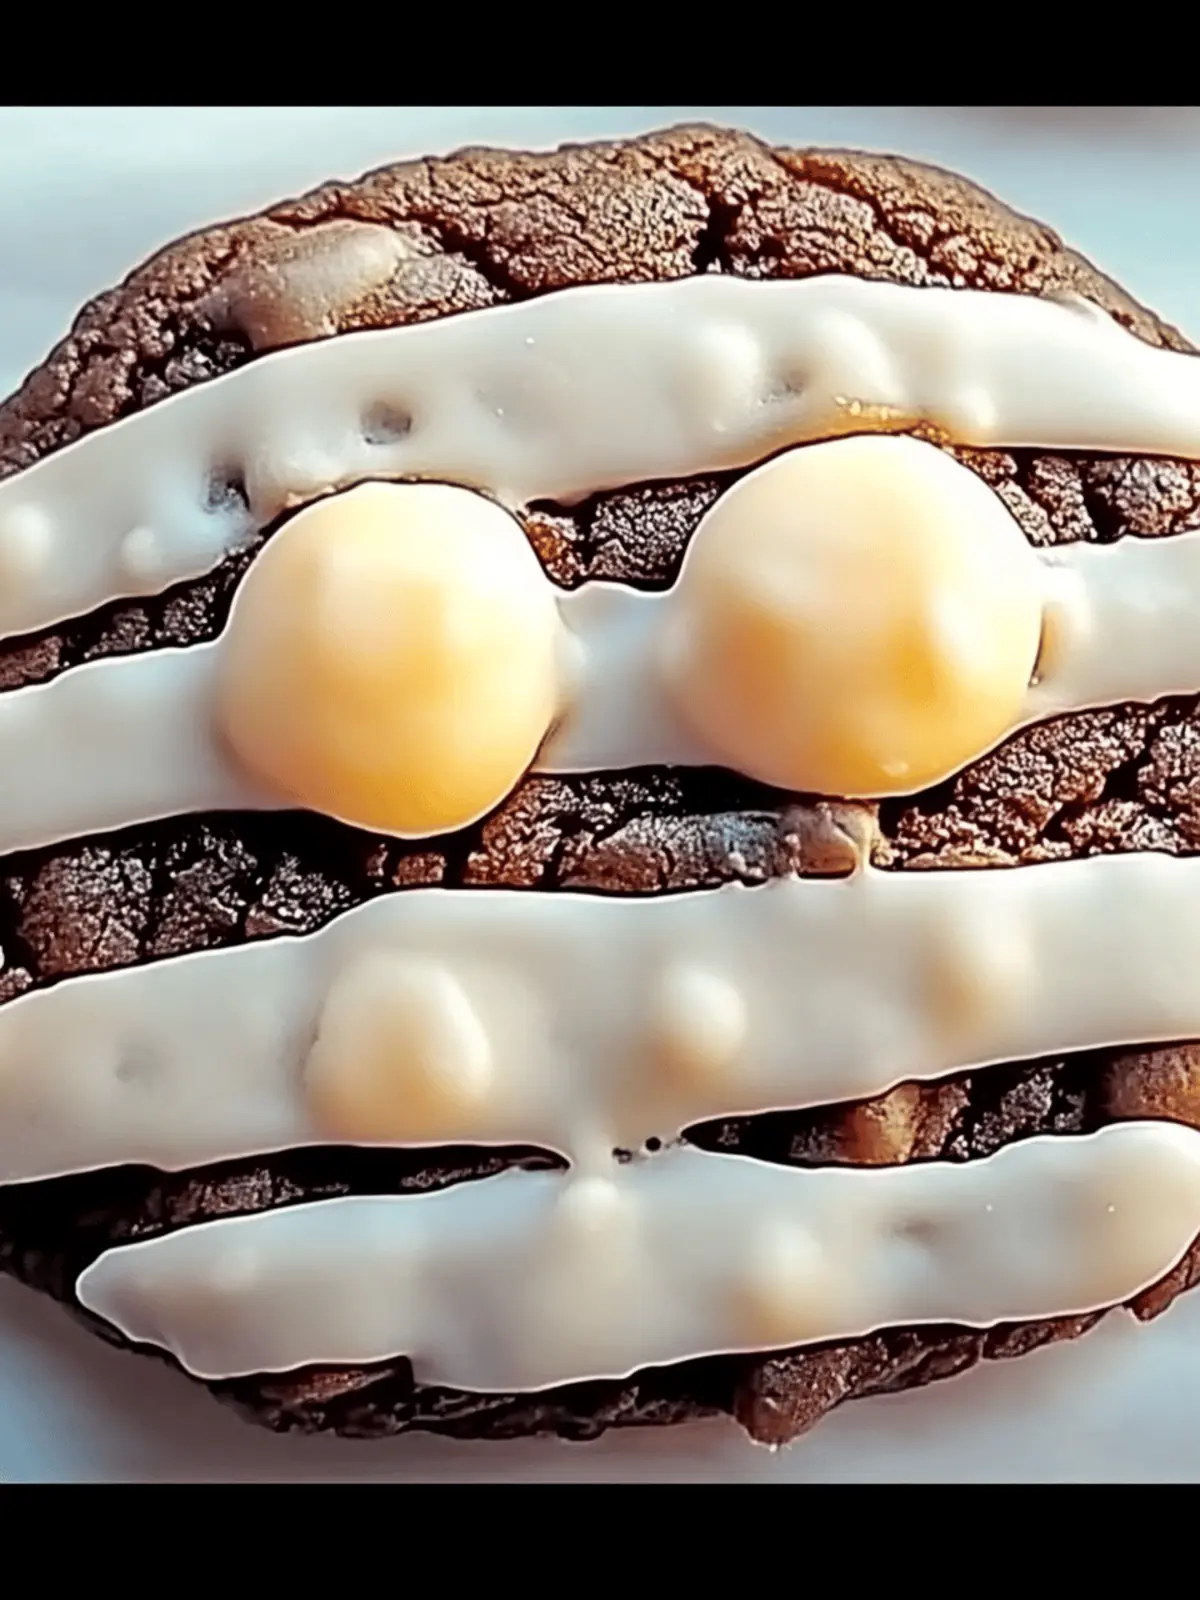
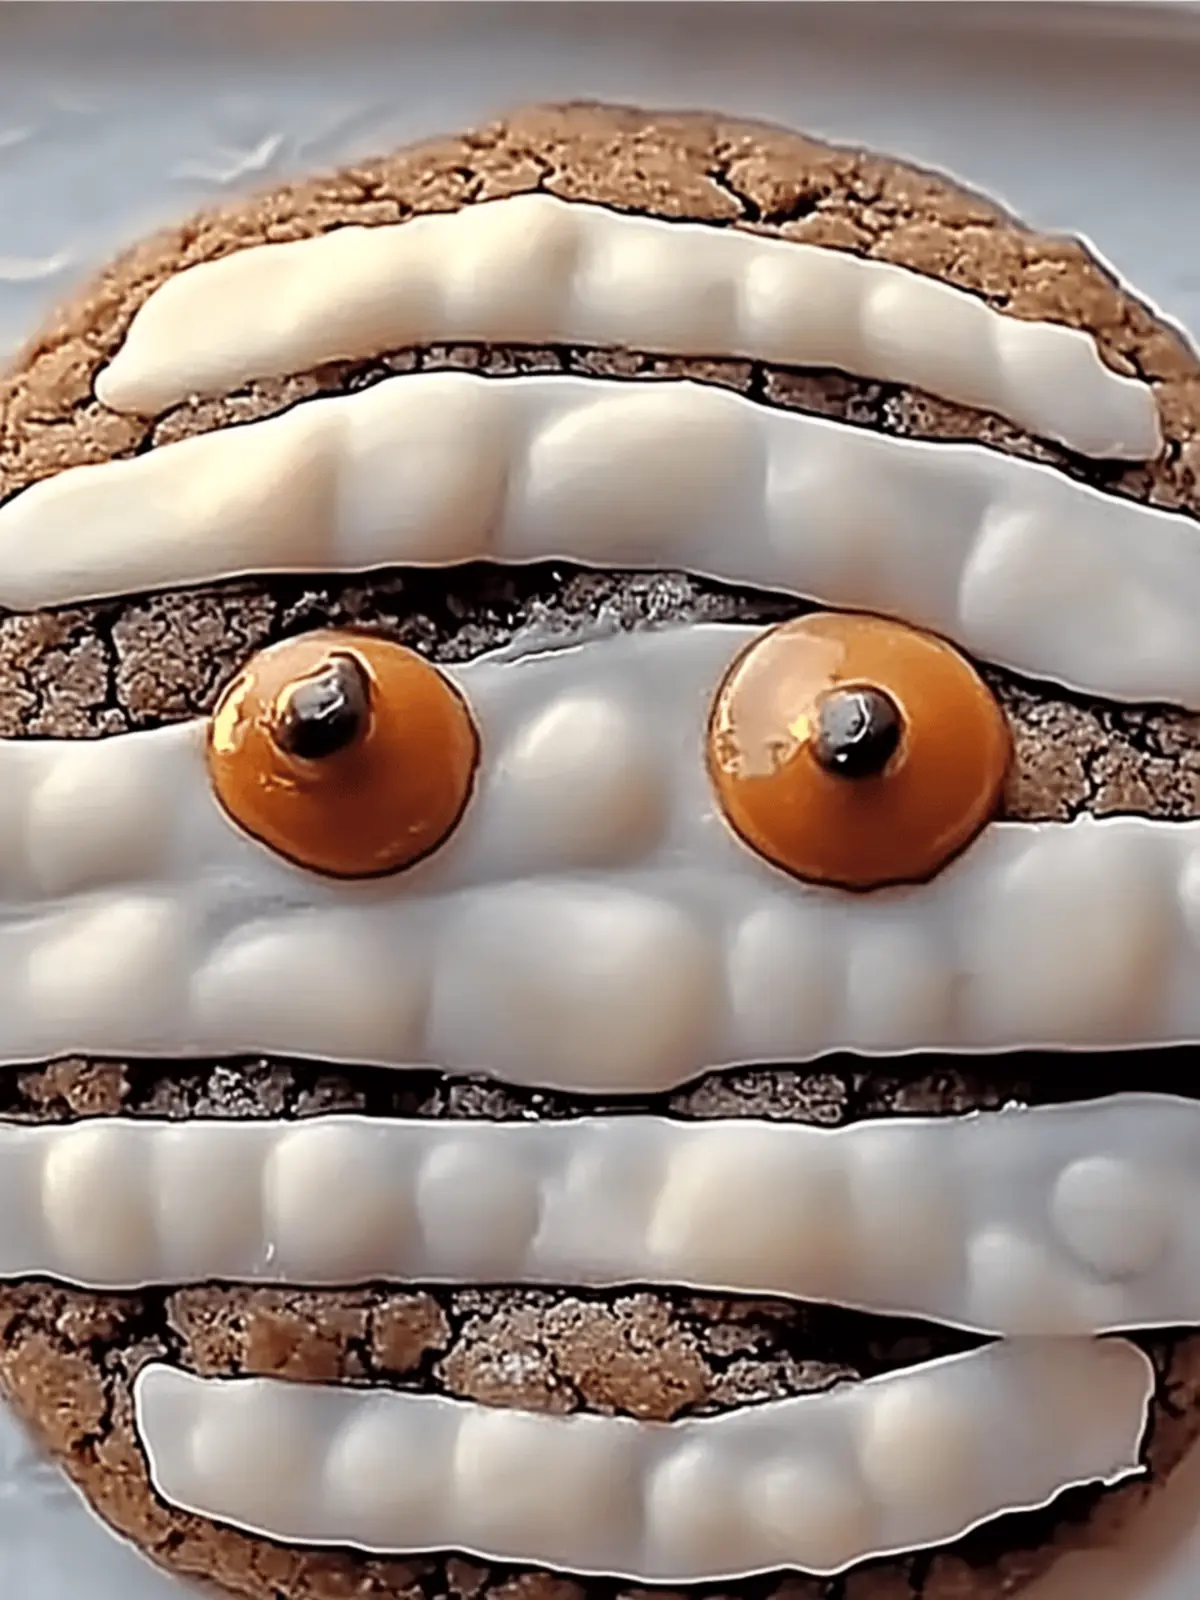
As the air turns crisp and the leaves begin to fall, the excitement for Halloween starts to creep into our homes. One evening, while the kids and I were brainstorming the ultimate spooky treat for their school party, we had a delightful discovery that transformed a simple cookie recipe into Fudgy Halloween Mummy Cookies! The rich, comforting aroma of chocolate wafted through the kitchen, a siren call to all who passed by.
These cookies aren’t just a feast for the eyes, with their playful candy eyes peeking through a frosting bandage; they’re an indulgent, fudgy delight that melts in your mouth. Plus, they are adaptable to fit all dietary needs, from nut-free to gluten-free, making them perfect for everyone to enjoy. Whether you’re whipping them up for a festive gathering or a fun weekend baking session with your loved ones, these cookies promise smiles and satisfied sweet cravings. Let’s dive into this spooktacular baking adventure together!
Why are Fudgy Halloween Mummy Cookies a Must-Bake?
Deliciously Indulgent: These cookies boast a fudgy texture that feels like biting into a rich chocolate truffle, perfect for any chocolate lover.
Festive Appeal: With their playful candy eyes, they bring Halloween spirit to your kitchen, thrilling kids and adults alike.
Customizable Options: Easily adapt the recipe to be nut-free or gluten-free, ensuring everyone can join in on the fun.
Easy to Make: The straightforward steps make this a delightful activity to enjoy with family, creating lasting memories.
Make-Ahead Convenience: Prepare the dough in advance, as it can be chilled for up to 24 hours, allowing for stress-free baking on busy days.
Crowd-Pleasing Treat: These cookies are sure to impress at any Halloween gathering, making them a great contribution to parties or school events.
Fudgy Halloween Mummy Cookies Ingredients
For the Cookie Dough
• Butter – Adds richness and moisture; substitute with margarine or vegan butter for dietary needs.
• Granulated Sugar – Provides sweetness and helps achieve the right texture; can swap with coconut sugar for a different flavor.
• Dark Brown Sugar – Enhances flavor with molasses notes, contributing to moisture; light brown sugar can also be used.
• Egg – Provides structure and moisture; for a vegan option, use flax eggs instead.
• Egg Yolk – Adds richness and helps with the desired texture; for a vegan alternative, use an additional flax egg.
• Vanilla Extract – Imparts warmth and flavor depth; pure extract is preferred for the best quality.
• All-Purpose Flour – Provides structure to the cookies; substitute with gluten-free flour for a gluten-free version.
• Cocoa Powder – Offers a rich chocolate flavor; unsweetened cocoa is best to control sweetness.
• Baking Powder – Acts as a leavening agent to help cookies rise.
• Baking Soda – Aids in browning and texture.
• Salt – Enhances flavor and balances the sweetness.
For the Frosting
• Powdered Sugar – Essential for making the delicious buttercream frosting.
• Room Temperature Butter – Creates a smooth frosting; can be replaced with non-dairy versions for dietary needs.
• Milk – Adds moisture to the frosting; any plant-based milk works for dairy-free options.
With these key ingredients, you’re just a few steps away from indulging in the enchanting world of Fudgy Halloween Mummy Cookies!
How to Make Fudgy Halloween Mummy Cookies
-
Melt Butter: In a saucepan, melt the butter over low heat. Make sure to stir occasionally, then let it cool to room temperature. This step ensures the dough remains thick while baking.
-
Mix Sugars: In a mixing bowl, combine the melted butter, granulated sugar, and dark brown sugar. Whisk until smooth, allowing the sugars to fully dissolve into the butter, creating a rich mixture.
-
Add Wet Ingredients: Whisk in the egg, egg yolk, and vanilla extract. Make sure to blend thoroughly until the mixture is fluffy and light, forming a lovely base for the cookies.
-
Combine Dry Ingredients: In another bowl, whisk together the flour, cocoa powder, baking powder, baking soda, and salt. Gradually mix these dry ingredients into the wet mixture, folding gently until just combined to keep the cookies soft.
-
Chill Dough: Cover the dough with plastic wrap and refrigerate for 30 minutes. Chilling helps prevent the cookies from spreading too much during baking, ensuring a perfectly fudgy center.
-
Preheat & Shape: Preheat your oven to 350°F (175°C). Scoop and roll the chilled dough into balls, then flatten them slightly before placing them on a baking tray lined with parchment paper for easy cleanup.
-
Bake: Bake for 9-10 minutes until the edges are firm and the centers look slightly soft. Allow them to cool on the tray for a few minutes before transferring them to a wire rack—the cookies will firm up as they cool.
-
Make Frosting: In a mixing bowl, whip together the powdered sugar, room temperature butter, and milk until the mixture is smooth and creamy. This frosting should be fluffy enough to spread easily on your cookies.
-
Frost & Decorate: Once cooled, generously frost the cookies with the buttercream and add candy eyes on top to create adorable mummy faces. Get creative with the frosting to make them as spooky as you wish!
Optional: Add a drizzle of melted chocolate on top of the frosting for an extra spooky flair.
Exact quantities are listed in the recipe card below.
What to Serve with Fudgy Halloween Mummy Cookies?
As you indulge in the rich, decadent delight of these spooky treats, why not complement them with some fun and festive flavors that will enhance your Halloween experience?
-
Witch’s Brew Hot Chocolate: This rich and creamy beverage, with hints of mint or caramel flavor, adds a magical touch to your cookie feast. Perfectly pairs with the fudginess of the cookies!
-
Pumpkin Spice Cupcakes: These delightful cupcakes bring a seasonal flair. Their moist texture and spiced flavor balance beautifully with the sweetness of the mummy cookies.
-
Crispy Apple Slices: Serve crunchy apple slices alongside for a fresh, tart contrast to the cookies’ sweetness. The balance of flavors creates a more rounded treat for all ages.
-
Creamy Vanilla Ice Cream: A scoop of this classic flavor drizzled with chocolate sauce can elevate your cookies to a decadent dessert experience. The creaminess complements the fudgy texture perfectly.
-
Goblins’ Glow Lemonade: Make a tangy, vibrant lemonade with a hint of mint. Its refreshing zing cuts through the sweetness of cookies, making it a delightful palate cleanser.
For a burst of flavor with an inviting aroma, these pairings will undoubtedly create a spooktacular treat table that keeps your guests delighted and enchanted!
How to Store and Freeze Fudgy Halloween Mummy Cookies
Room Temperature: Store cookies in an airtight container at room temperature for up to 3 days to maintain their fudgy texture and sweetness.
Fridge: If you prefer a firmer cookie, you can refrigerate them for up to a week. Just be sure to separate layers with parchment paper to avoid sticking.
Freezer: Freeze cookies in an airtight container for up to 3 months. Layer them with parchment paper to keep them separate. Thaw overnight in the fridge before enjoying.
Reheating: For a warm, melty treat, reheat cookies in the microwave for about 10-20 seconds, bringing back that delightful fudgy feel!
Make Ahead Options
These Fudgy Halloween Mummy Cookies are fantastic for meal prep, allowing you to enjoy stress-free baking during the spooky season! You can prepare the cookie dough up to 24 hours in advance; simply cover it tightly with plastic wrap and refrigerate to maintain that delightful fudgy texture. Additionally, the buttercream frosting can be made and stored in the refrigerator for up to 3 days. When you’re ready to bake, just scoop the chilled dough onto a baking sheet and follow the usual baking instructions, ensuring you have delicious cookies at your fingertips with minimal effort. With these make-ahead tips, you’ll have more time to celebrate Halloween with your family!
Expert Tips for Fudgy Halloween Mummy Cookies
-
Cool the Butter: Allow the melted butter to reach room temperature before mixing. This prevents the dough from spreading too thin during baking.
-
Chill Longer if Needed: If the dough feels too sticky, extend the chilling time. This will help you shape perfect cookies without the mess.
-
Whip Frosting Well: Ensure your frosting is whipped for about 3 minutes until it’s fluffy and easy to spread. This makes decorating your Mummy Cookies even more fun!
-
Store Properly: Keep the cookies in an airtight container at room temperature to maintain freshness and soft texture for days.
-
Customize with Ease: Feel free to swap in gluten-free flour or omitting nuts to suit your dietary needs, ensuring everyone can enjoy these Fudgy Halloween Mummy Cookies!
Fudgy Halloween Mummy Cookies Variations
Feel free to unleash your creativity and customize these delicious cookies with these fun and tasty twists!
- Nut-Free: Use sunflower seed butter instead of regular butter for a delightful nut-free version while maintaining that rich flavor.
- Gluten-Free: Swap regular all-purpose flour for a gluten-free all-purpose blend to make this spooky treat suitable for those with gluten sensitivities.
- Vegan: Replace the butter with coconut oil and the eggs with flax eggs for a vegan-friendly version that still yields a fudgy delight.
- Dark Chocolate Twists: Incorporate semisweet or dark chocolate chips into the dough before baking for an extra chocolatey experience that will have everyone swooning.
- Spicy Kick: Add a pinch of cayenne pepper to the dough for an unexpected yet delightful heat that perfectly contrasts the sweet chocolate flavor.
- Fruity Flavor: Fold in dried cherries or cranberries into the cookie dough for a burst of fruitiness that complements the rich chocolate well.
- Flavored Frosting: Experiment with different extracts like almond or peppermint in the frosting for a fun twist that refreshes the taste.
- Crispy Edge: If you prefer cookies with a little crunch, bake them a minute or two longer, allowing for a crispy edge while keeping that fudgy center intact.
No matter how you choose to customize your Fudgy Halloween Mummy Cookies, each variation promises to deliver joy and delight to all who indulge!
Fudgy Halloween Mummy Cookies Recipe FAQs
How do I select the best ingredients for my cookies?
Absolutely! For the best Fudgy Halloween Mummy Cookies, choose high-quality ingredients. Look for unsweetened cocoa powder that’s rich in flavor and opt for fresh eggs. For the butter, use unsalted varieties to control the saltiness. If you’re making gluten-free cookies, select a gluten-free all-purpose flour blend with xanthan gum for better texture.
How do I store my cookies to maintain freshness?
To keep your Fudgy Halloween Mummy Cookies fresh, store them in an airtight container at room temperature for up to 3 days. If you prefer, you can also refrigerate them for about a week, ensuring to separate layers with parchment paper to prevent sticking. Remember, soft cookies tend to lose moisture in the fridge!
Can I freeze leftover cookies, and how?
Absolutely! To freeze, start by ensuring your cookies are completely cooled. Place them in an airtight container, layering them with parchment paper to avoid sticking, and they can stay frozen for up to 3 months. When you’re ready to enjoy, simply thaw the cookies overnight in the fridge. If you want that freshly baked warmth, microwave them for 10-20 seconds.
What if my dough is too sticky to handle?
Very common! If your dough feels overly sticky, don’t worry. Extend the chilling time to about 1 hour in the refrigerator. This solidifies the dough and makes it manageable. You can also dust your hands and the work surface with a little flour while shaping the cookies to help with stickiness!
Are these cookies safe for pets or specific dietary needs?
When it comes to furry friends, it’s essential to avoid giving them any cookies containing chocolate or sugar, as these can be harmful to pets. For allergies, ensure to substitute any allergenic ingredients in the original recipe, such as nuts or gluten, making these Fudgy Halloween Mummy Cookies adaptable for nut-free and gluten-free diets!
How can I make these cookies vegan?
For a delightful vegan version of Fudgy Halloween Mummy Cookies, replace the eggs with flax eggs (1 tablespoon of flaxseed meal and 2.5 tablespoons water = 1 egg). Use vegan butter or margarine instead of regular butter, and ensure your frosting is made with plant-based milk. Follow the recipe as usual, and enjoy a spooky treat that’s suitable for your vegan friends!

Fudgy Halloween Mummy Cookies for Spooktacular Fun at Home
Ingredients
Equipment
Method
- Melt Butter: In a saucepan, melt the butter over low heat. Stir occasionally, then let it cool to room temperature.
- Mix Sugars: In a mixing bowl, combine the melted butter, granulated sugar, and dark brown sugar. Whisk until smooth.
- Add Wet Ingredients: Whisk in the egg, egg yolk, and vanilla extract until fluffy.
- Combine Dry Ingredients: Whisk together flour, cocoa powder, baking powder, baking soda, and salt. Gradually mix into wet mixture.
- Chill Dough: Cover the dough with plastic wrap and refrigerate for 30 minutes.
- Preheat & Shape: Preheat your oven to 350°F (175°C). Scoop and roll the chilled dough into balls, then flatten them.
- Bake: Bake for 9-10 minutes until edges are firm. Allow cooling on tray.
- Make Frosting: In a bowl, whip together powdered sugar, room temperature butter, and milk until smooth.
- Frost & Decorate: Once cooled, frost cookies and add candy eyes. Get creative!


